Monday, March 29, 2010

Cream, Sugar, Butter, Yum.

Monday was an pretty easy day, we made only a few products and finished up anything else that needed to be don e.
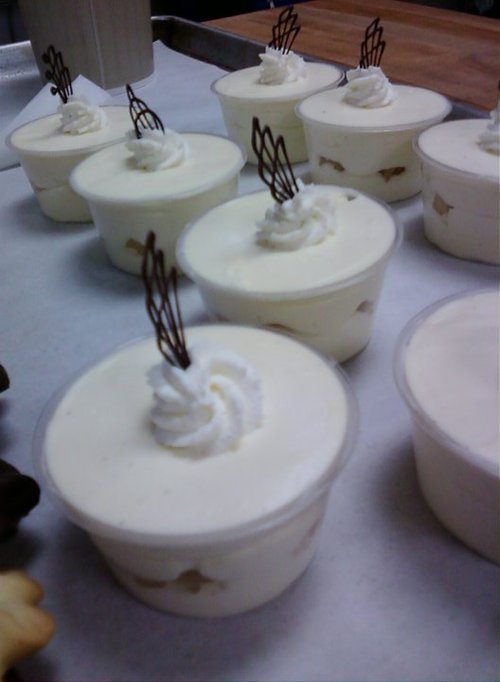
Diplomat cream

Again we made diplomat cream (see previous entry for how to) only this time the one to one ratio was stablized with several sheets of gelatin and then cooled until very thick. This was to be used to napoleons annnnnnd to be piped onto my finger and into my mouth after.

Napoleons-Day 1

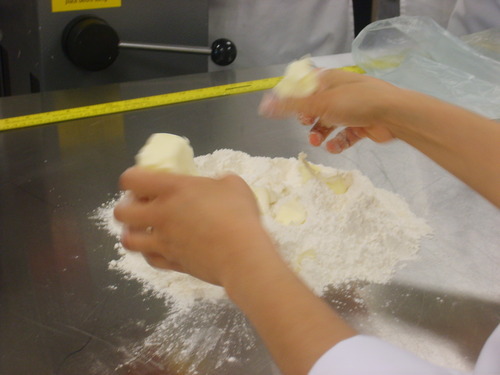
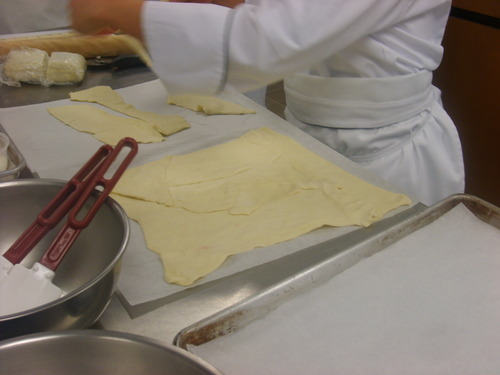
Napoleons are a very good way to use up any large scraps of puff dough. Or you can use a new piece of fresh puff.

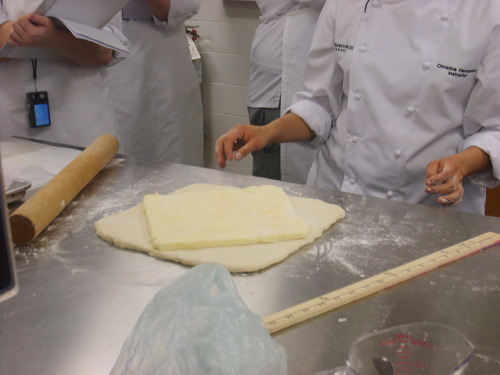
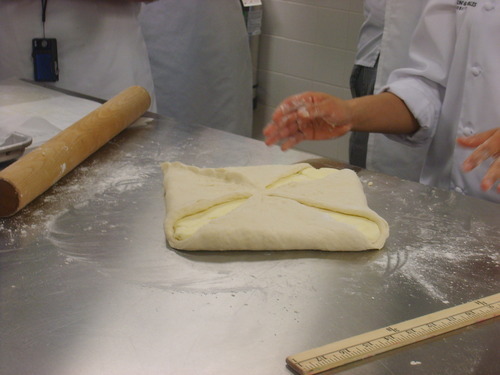
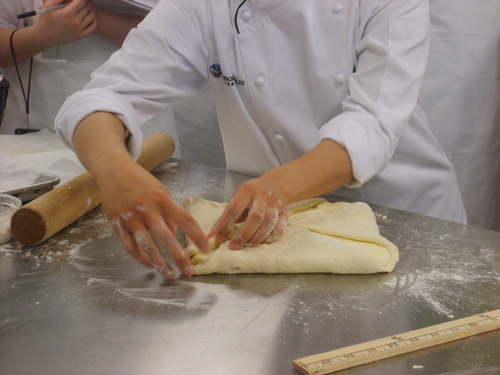
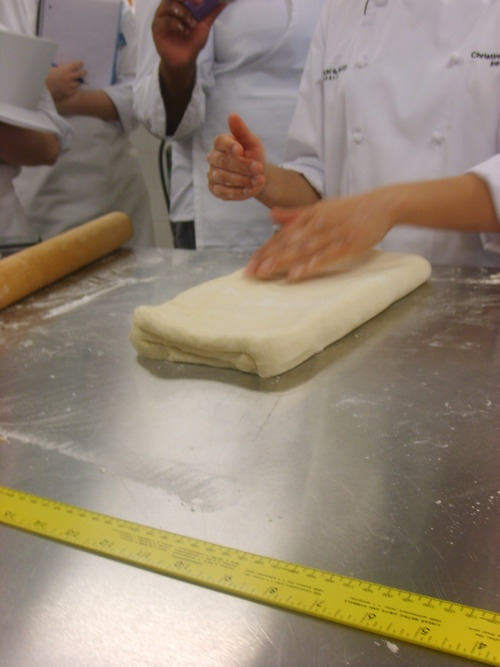
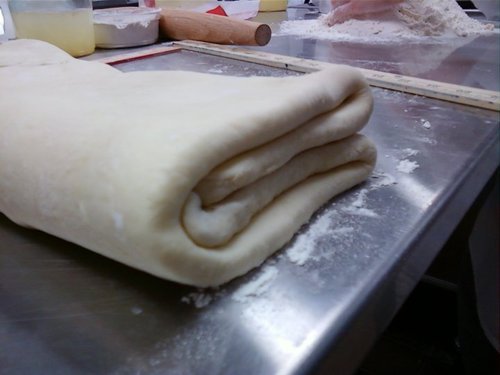
Start being using pieces of the puff, sort of piecing together like a puzzle forming a rectangle shape about the size of a half sheet pan

Piecing the Puzzle

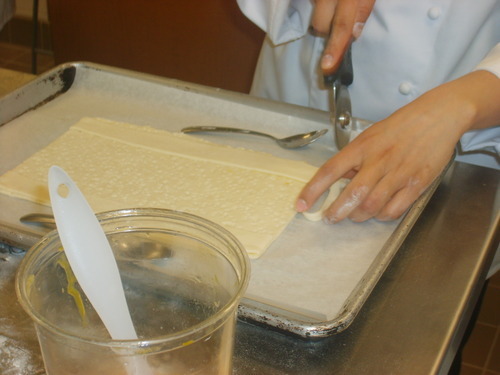
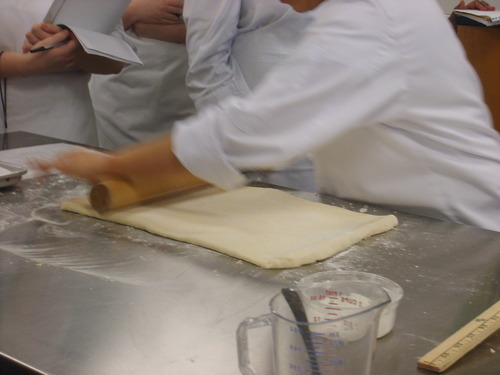
Once you have created your rectangle, roll it out a little thinner focusing on the overlapping parts. This will also help bind the pieces together. Poke many many holes in the dough. After this place on a parchment lined pan then cover with more parchment and place the same size pan on top and bake until very golden brown.

Once it has cooled, trim the edges of the width. Then measure the width of the baked sheet and cut into the equal thirds.

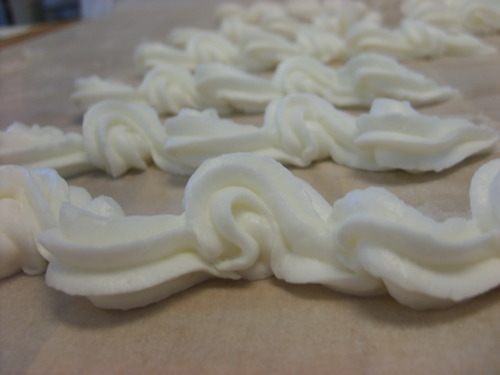
Place the largest pieces of puff down and fill a pastry bag with the diplomat cream using a medium sized round tip to pipe with. Pipe the cream from left to right in a snake like pattern continuously all the way down the length of the puff piece.

Piping the diplomat cream out

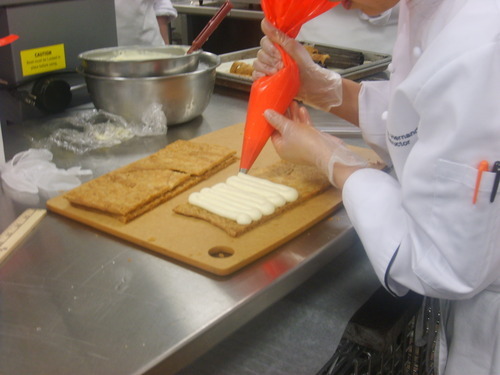
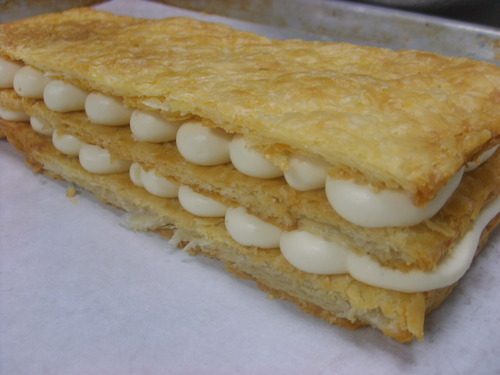
Place the second piece on top lightly (placing any broken pieces in the middle layer). Pipe as before, and freeze until the next day (you will find out how to finish it next entry)

Final layers of the napoleon
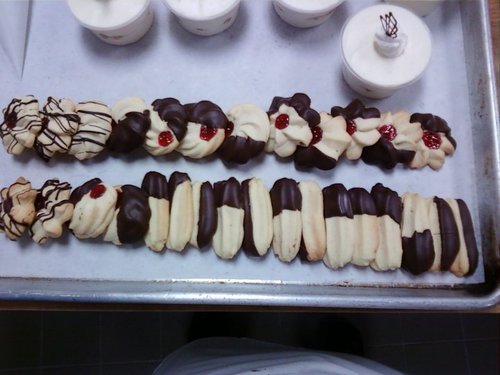

Cream Horns

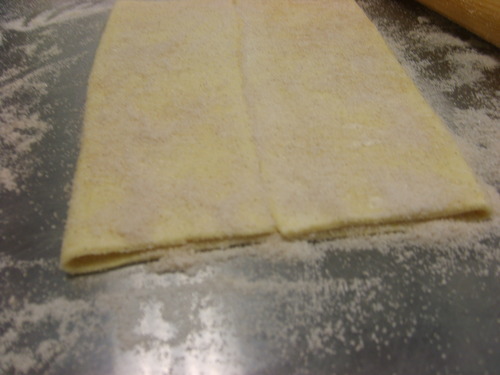
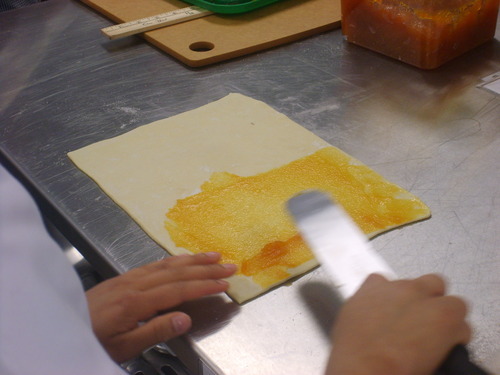
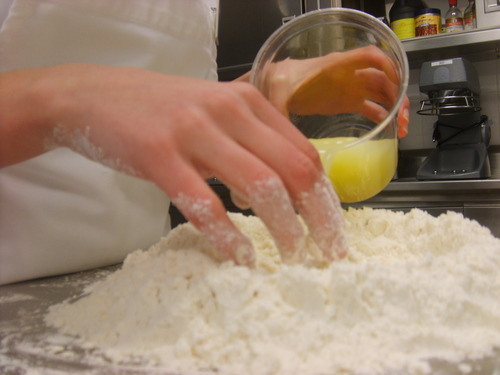
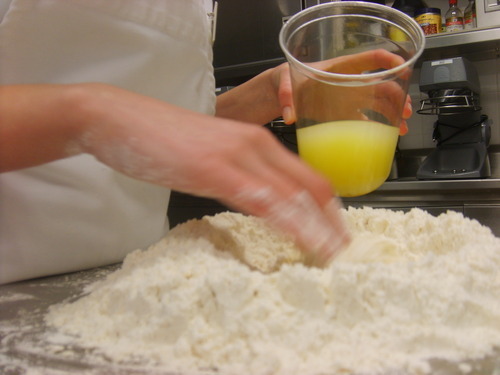
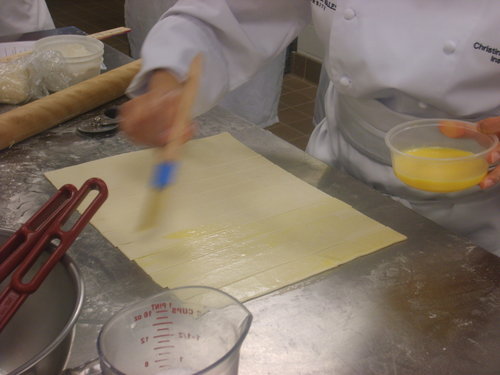
Roll out the puff pastry to the same thickness as always before (about 1/8 inch). Clean up the edges of the dough so you get a very near perfect rectangle shape. Then cut strips of the dough (either way length or width) the width of the ruler (about 1 inch).

Lightly egg wash these strips of dough, this will keep the dough from unraveling.

Egg washing the strips of dough

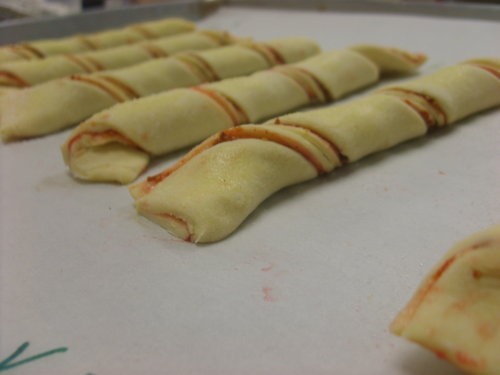
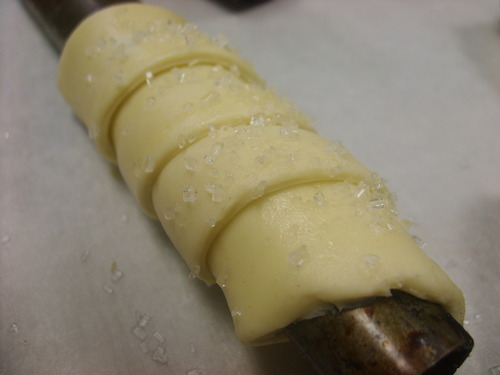
To Shape the horn, you must have a metal tube (tapered is best) as shown.

Wrapping the dough around the tube

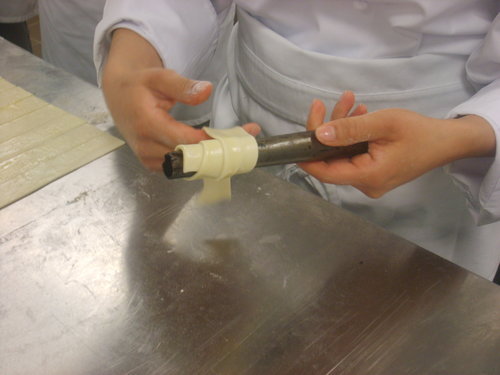
Once the dough is wrapped all the way around, slightly overlapping each edge, place seam side down on the pan and sprinkle with sanding or coarse sugar.

Ready to Bake

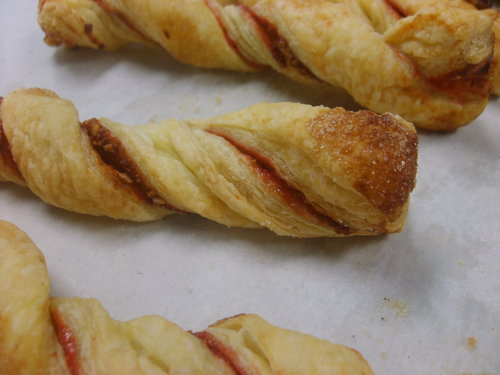
Bake until golden brown, and while still warm, gently rock the tube back and forth to remove from the pastry. Or you can try pressing up on the flat surface that is baked on the actual sheet pan. Be careful, they are fragile and may break.

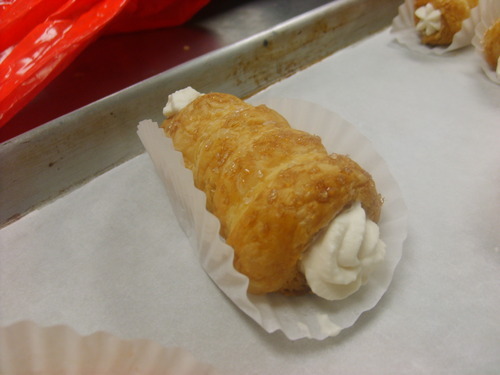
To finish these, we used Chantilly cream stabilized with gelatin again. A flavor can be added to the reserved cream used to heat up and dissolve the gelatin. Basically, you make Chantilly cream as you would usually except you reserve some cream. Bloom your gelatin in cold water and add to the reserved cream. Then heat slightly to dissolve the gelatin. Add flavor now if desired, heat with melt down solids if using a jam. Then before you have achieved soft peaks on your cream, slowly poor this mixture down the side of the bowl and then continue to whip as usual.

Pipe the cream using a medium star tip ending with a little rosette at the end if desired

Finished Cream Horns

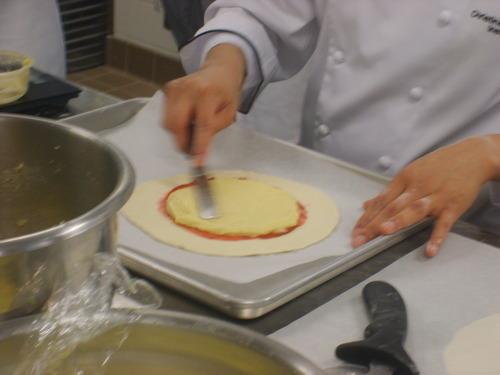
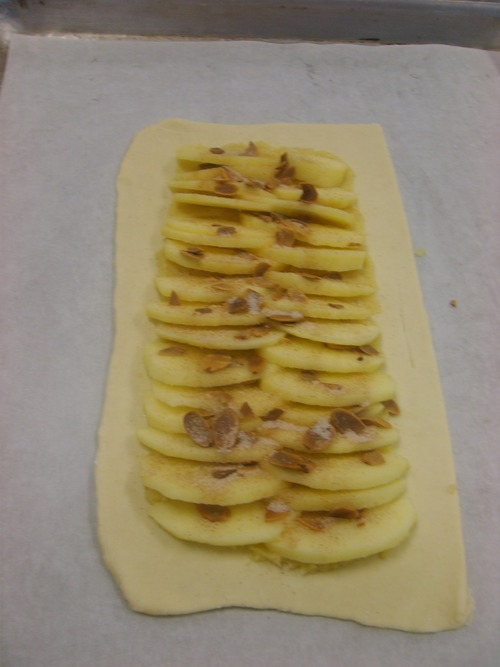
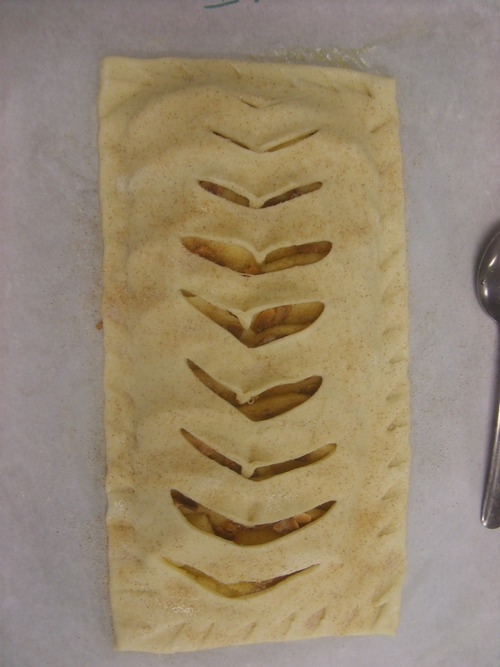
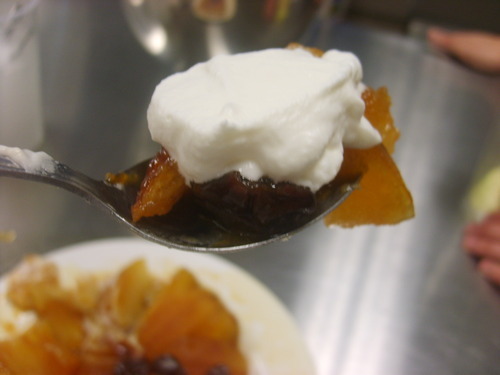
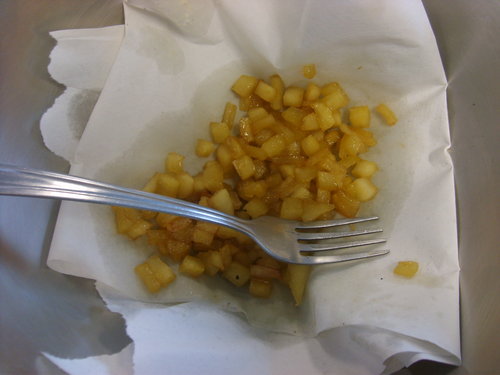
Finishing the fruit strip

To finish up the fruit strip from thursday, you spread a fair amount of pastry cream onto the puff, however not on the little walls on the sides. Then you slice/peel/segment any fruit you wish (I used kiwi and strawberries) and arrange tightly and in an appealing way on the along the length of the strip. When done with this, finish with an apricot or mirror glaze this will extend shelf life and create a sheen. Slice to serve.

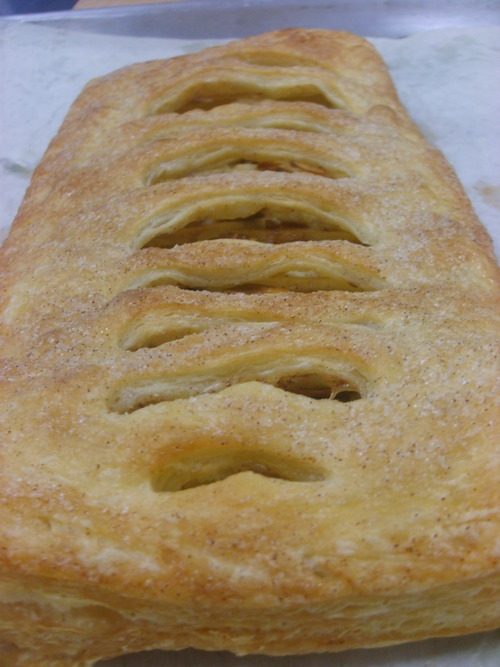
Finished Fruit Strip


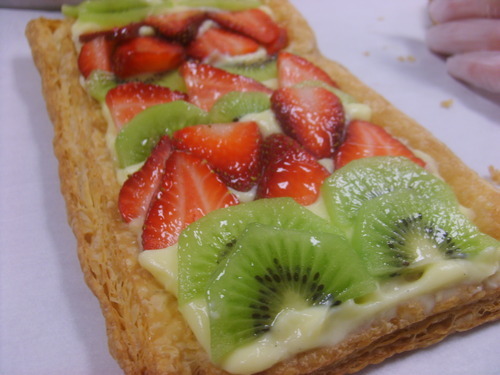
These are a personal favorite of mine. I consider myself an advocate for pastry cream and this is putting it to good use. Pastry cream + Puff Pastry + Strawberries= amazingness (not even chocolate is necessary)

Sunday, March 28, 2010

Getting Creative with Puff

Thursday, We used our freshly made puff pastry dough to create several yummy items.

First Chef demoed how to make almond cream other wise known as frangipane.

It is very similar to making any basic cookie dough. Cream the butter and sugar, add the egg,then the almond flour and then cream/liquors.

Then she demoed pastry cream but i didn't take any pictures because i already have pastry cream demo pictures.

Pithivier

A pithivier is a round puff pastry filled with jam and a mixture of pastry cream/ frangipane

With one 6th of the dough made previously, roll it out very thin, about the same thinness as the day before (1/8 inch ish). Cut out a 9 inch circle, if possible cut out two from one piece, if not do the same with another 6th of the dough.

Place the bottom layer of the dough on the lined pan and spread a thin layer of jam leaving a one inch border all the way around. Then place second filling on top of that, using 2 parts frangipane to one part pastry cream.

Spreading on the jam and frangipane/pastry cream inside


Covering with 2nd round of puff pastry

When doing this step, egg was the edge of the bottom layer of dough. Be careful not to get any air bubbles, if any occur try and press towards the center of the pastry.


Next, freeze the pastry until firm. To finish, cut the edges of the circle with a small sized round cutter or exacto knife. Be careful to leave space between the cut edge and the filling otherwise you will leak. Then poke a whole in the middle of the pastry, this will release any air pockets

From the small hole in the middle, carefully, create a "sun" or wave shape on the dough using an exacto knife on an angle, much like scoring a baguette as pictured below.

Cutting the Pithivier


Eggwash and bake until golden brown

My finished Pithivier


Jalousie

This is similar to a strudel only you are using puff pastry. Roll out a 6th of the dough, to the same thickness as before about 1/8 inch or a 11x13 inch square. Cut one square slightly larger than the one when cutting the piece in "half".

Place the smaller rectangle of dough on the sheet pan. And place about 3 tablespoons of the prepared frangipane onto the dough, leaving a border of about 1/2 inch.

Thinly sliced peeled fruit is then shingled down the length of the dough, covering the almond cream. I used apples.You can also add, any nuts, dried fruit (softened up by liquors as well as cinnamon sugar.

I used toasted almonds and tons of cinnamon sugar for the inside

With the larger rectangle of dough, fold in half and slice several uniform slits along the fold, this will vent the product. Then clean up the edges with a pastry wheel and seal the edges using a paring knife, fork or spoon Cream wash (straight heavy cream brushed on) and if desired sprinkle with any type of sugar (i used cinnamon sugar again)


Baked Jalousie


Fruit Strips Part One

To create the shell of the fruit strip. Roll out the 6th of dough to the same thickness, about a 12 x13 inch rectangle. Cut the dough 7 inches in, place piece on the parchment lined pan. And poke tons and tons of holes in it, this will prevent rising, to keep a open shape to be filled.Then using a ruler cut two strips, the width of the ruler. Egg wash the edges of the larger piece and place the strips of cut dough along the sides, clean up the edges with a pastry wheel and bake.

These will be filled with pastry cream and fruit, sooooo yummmy!

Wednesday, March 24, 2010

Elephant ears and pies, OH MY!

Day 2, Classic Pastry. Palmiers,Sacristans, and tarte tatin. yum, yum and yummiest.


Today was a faster paced, yet fun day of class. Lecture only lasted about 20 minutes, if that. Aced my quiz, i hope. And then we had probably an hour and a half of demo. For every product we used commercial puff pastry

First Chef demoed how to make the Palmiers, which are more commonly known as elephant ears (elephant footprints?). Puff pastry COVERED in cinnamon sugar.

To shape the palmiers, we rolled out the puff pastry dough thinly using cinnamon sugar instead of our flour to prevent sticking. When it was at the desired thickness, more sugar was added to both sides, and you then lightly press it into the dough with the rolling pin.

First, Take the left hand edge and bring it to the middle of the dough, and do the same with the right. Add more sugar in an even fashion.

First Fold


Then for the second fold, you repeat the first step. Bring both the left and right hand edges into the middle of the dough. Again add more sugar evenly


Second Fold


Then for the last and final fold, use a wooden spoon or ruler to create an indent in between the two stacks of fold (do not cut the dough!) this will facilitate easier folding. Then bring the left side on top of the right folds

Final Fold

Trim off the uneven ends with a french knife. Then mark your desired size (less than one inch) and cut each piece. Place on parchment lined pan, pinch the bottom a little and flair out the "ears". (i was confused too, don't worry, just wing it!)

Pinched and flair

Note: upon experimentation we figured out that if you lightly egg wash each inner layer before sprinkling cinnamon sugar, it will keep the ears together.

Bake 400 F flipping halfway through

Baked Palmiers

Finished they are crispy, flaky, chewy and sugary sweet!

Sacristans

we started off with a sheet of puff pastry and thinned it out a little as before. Then cut in half. On one half you lightly spread your desired filling (don't use too much!). I used raspberry jam and crushed almonds. Then you place the "naked" piece on top and lightly go over the dough with a rolling pin.

Filling the sacristans- (chef used orange jam)

Then mark your desired strip width, (less than an inch). And cut strips.

Cutting the strips

Then, to create the shape, take each strip and tightly twist up the strip as pictured, use a little egg wash to secure the ends to the parchment and prevent unraveling.

Twisted up

Bake at 400 F or so, until golden brown

Baked Sacristans

The finished twists were flaky, and slightly sweet with hinds of the filling through out.

Tarte Tatin

To begin, add white sugar to a dry pan, and stir constantly until it begins to caramelize and turns brown in color, do not burn though. Add the butter, it will spatter. Then stirring vigorously add desired liquor (i used apple brandy). When your caramel is all together, add your dried fruit ( i used dried cherries).

Caramelizing the sugar

Arrange your apple 8ths in a tight circle with the smooth side down, then fill in the spaces between those, with the smooth side up, also fill in the middle with a cut pieces of apple. Basically you do this to make it look nice, and fill up the pan with granny smith apples. I used just short of three peeled apples.

Arranged Apples

To finish the tarte, roll out puff pastry, to be slightly thinner than purchased, use a plate slightly larger than the pan used, and cut out a circle of dough. Place the circle of dough on top of the arranged apples, pushing down any extra dough. Bake at 400 F and then flip out after a few minutes of cooling, serve with whipped cream.

Covered with puff pastry

Finished and flipped out of the pan

And to close....My Perfect Bite of deliciousness.

Tuesday, March 23, 2010

Making the Puff (pastry), the old fashion way.

Classic Pastry, room 302 with Chef Hernandez.

Day 1, I went into this class not very excited about my baking education. I was kind of deflated (if you will) in fundamentals, I suppose due to lack of challenge and new content. I also knew little about my chef, just that she was young and new to the school.

Well I was pretty pleasantly surprised. So far, she seems nice enough, although it is quite different to have a young chef.

Today was a very relaxed easy day. Our chef demoed how to make puff pastry dough, as well as all the fold involved. Puff pastry is like a croissant, it is laminated (alternating layers of dough and fat) however, puff pastry does not contain any leaveners.

Our chef showed us the old fashioned way, without mixers! And boy did we make a mess!

First Bread Flour and Salt are put on the table in a mound, and butter is cut in (just like a biscuit or scone) to the consistency of sand and until the mixture turns a creamy yellow color.

Chef Adding the Butter to the Flour & Salt

image

Once it has the consistency of sand, you make a well in the middle of the mound and slowly incorporate your egg and water mixture, keeping the middle dough very wet slowly adding more and more flour each time, until all the liquid is added (not all the flour will be added some of the time and the dough should be not very sticky)

Adding the Egg/Water Mixture in the well

image

Mixing the dough by handimage

After the dough is formed, refrigerate the dough for 20-30 minutes until firmer and cold (ish). Meanwhile, create your roll in fat block. We used Plugra which is a European style butter (higher butter fat, YUMMM!)

Once the butter is scaled out, it is then pounded (into submission) to room temperature/ malleable. Then formed into a squarish shape. Then place the butter in between a piece of parchment, to help keep it from sticking, and use a rolling pin to roll the fat out into the desired size. ( 9 x 9 inches). When that is done, depending on your timing stick in the fridge or freezer, so the butter will stiffen up a little, but when removed will be malleable still.

When both are cold but at the same consistency, roll the dough out into a square of desired size (12 x 12) then place the butter block, so that it makes a diamond shape

Butter on top of the dough

image

Then bring the corners of the dough up to the middle, like a pinwheel sort of. Then bring the seam together and seal all the way around. And then just lightly roll over the top with a rolling pin to smooth out the pinching.

Pinwheel Shape (starting to be pinched)

image

Pinching the seams together

image

Then roll the dough to be 12 inches wide by 20 inches long

Be sure to cut away any edge pieces that do not have butter.

image

Fold the dough in three (this is called a tri fold)

image

Once this is done, cover and put back in the cooler for 20-30 minutes . After that, you do a 4-fold, which is the same process except you roll it out to 22 inches long and 12 inches wide. Fold each edge to the middle line and then bring those pieces in together to create four layers.

4 fold

image

Then return the dough to the cooler for another 20-30 minutes, repeat a tri fold, return to the cooler, then repeat a 4 fold. Then your dough done.

Fundamentals...a wrap up.

I created this blog, with the intention of daily entries about class. However, with fundamentals....there was not much to blog about.

Lets just say fundamentals was kind of..."low production".

We spent several days just practicing piping butter cream and chocolate as well as our knife skills and anything else we felt necessary for our practical.

Some of my piping


Day 8, Thursday (the day after ST. Patty's Day)....terrible day in South Hall.

Some JERK (to be kind) decided it would be a splendid idea to play with the fire extinguisher at 4:40 am....setting off the alarm and leaving all 500 of us residents outside, on the green for an hour and then we spent ANOTHER hour inside the gymnasium. No one was happy. And then just when i got back to sleep and had about another hour or two, the alarm went off AGAIN. It was like a sick joke.

So with four hours of sleep, I went to my SIX hour lab, to take an exam he told us nothing about and a very vague practical. Not my best day, curdled my first creme anglaise...ohhh well. Raced around frantically the whole day, it was ridiculous, 6 burners for 18 students making 2 different items on the stove. Not to mention, about 8 mixers for the room, each of us had to make an item in that as well.

For Day 1 of our practical, we had to make creme anglaise, pastry cream (both of which we had to monitor and record cooling temps) as well as butter cookies and roasted pineapple. By the end of the day, I just wanted to sleep and nothing more. I kind of, lost my steam. Not to mention, the class also curbed my enthusiasm about labs.

For Day 2 of the practical (last day of class) less stressful and less hectic. First, I cut apples into the four different cuts we were being tested on, once my chef inspected them (did well on most cuts) I went back to the stove and sauteed the apples with a little bit of brown sugar and clarified butter (yumm!).

Sauteed Apples


These apples were to be used in our diplomat cups. But in order to make the cups you had to make the cream. Which was just pastry cream folded into whipped cream, good stuff! So first you put down a play of diplomat cream, then the cooled sauteed apples followed by more cream and is topped off with a rosette of whipped cream and a chocolate filegree.

Diplomat Cream (not entirely incorporated yet!)


Finished Diplomat Cups


After this, I had to temper chocolate using the vaccination method. And with the tempered chocolate I had to pipe about 60 filegrees and then finish my butter cookies. When it was all said and done it all had to be presented to our chef one person at a time.

Finished Butter Cookies


Overall, i'm quite glad this class is over. The practical went well, I think and I won't know for sure until about thursday or friday. Wish me luck!

Friday, March 12, 2010

Pastry Cream Blissfulness.

Day 4

Friday class....nobody likes those. BLEH and you can almost guarantee a good portion of the class is skipping (here at Jwu we don't believe in Fridays). We also had a "sub" chef today and will also on Monday and Tuesday. Lecture lasted longer than usual on topics we all have heard several times before, and in greater depth during baking science.

Two words, Pastry Cream.
For those of you who have never come across this before (or at least a well made one). It is absolute heaven. It's like the best vanilla pudding you will ever have...buttery and decadent, spotted with vanilla bean. And most pastry students are obsessed with it.
Chef gave us a demo on pastry cream (which we all already knew how to make...)

Pastry Cream Mise en Place


Chef Demo

Then Chef Demoed how to core and prepare a pear for poaching.
Here's mine...

The Poaching liquid was equal parts water and red wine, with sugar, cinnamon sticks and a few cloves. It smelled wonderful.


After they boiled in the liquid for a while, and came out a blush pink, we cooled the pear and the liquid and stored them together in the fridge to marry together further over the weekend.

We also had to make Carrot cookies....which were odd to say the least, and ended up being like little bite size pieces of bland carrot cake.

We also finished our butter cookies by dipping them in tempered chocolate, you should hear the snap on that chocolate!


And on a slightly savory note, our Chef took all the potatoes we spent all that time practicing with on the first day of class, and made us mashed potatoes. They were gooooood.